

- To create a new user
- To manage a user’s profile
- To manage your personal data
- To manage administrator’s profile
- To log out a user from a project
- To share access to a project
- To revoke access to a project
- To set a user as a project owner
- To cancel project ownership
- To change password
- To change administrator’s or user’s password
- To end a user’s session
- To remove a user
Your user management rights are restricted to your user type.
Users and their profiles are managed in the USERS tab of the Control Panel.
Administrator rights are required.
- Log in as administrator.
- Click the USERS tab to open the user management section.
-
Now, open the Add New User dialog box by clicking either of the following:
-
 Add new user
button in the center of the screen (If it is the first user you're adding).
Add new user
button in the center of the screen (If it is the first user you're adding).
-
 Add new user
button in the top right corner of the layout.
Add new user
button in the top right corner of the layout.
-
-
In the opened dialog define the new user's details.
- Name — specify the name of the new user.
- Surname — specify the surname of the new user.
- Email — specify the e-mail of the new user.
- Password — specify the new password of the new user.
- Confirm password — confirm the new password of the new user.
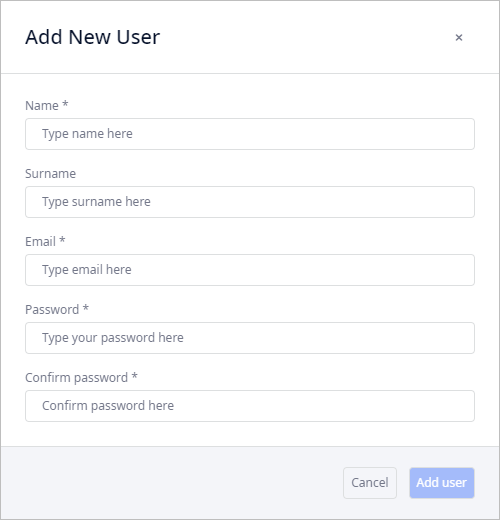
- Finally, click Add user.
Administrator rights are required.
- Log in as administrator.
- Click the USERS tab to open the user management section.
-
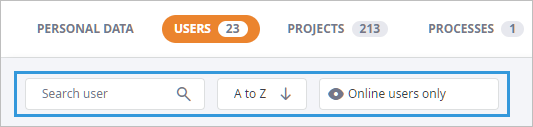
Use the filters above the list of users to find the required user.
- Select the required user to open its profile in the right panel.
- The PERSONAL INFO section opens by default. You can now manage the user's profile.
You must be logged in as a user.
-
In the anyLogistix toolbar click
 and select
 Control panel.
- Click the PERSONAL DATA tab. Your profile will open.
-
Edit the required information by clicking the required field:
- Name — specify the new name.
- Surname — specify the new surname.
- Password — [not available in the desktop version] click the Change password button to change the password.
- License — click Show info to see license details.
- Log in as administrator.
-
Click the PERSONAL DATA tab. The administrator profile will open:
- Name — specify the new name.
- Surname — specify the new surname.
- Password — click the Change password button to change the administrator's password.
- Click Save changes.
You can log out a user from the project either from the user's profile or from the project's profile.
- To log out a user from the project via the user's profile
-
Administrator rights are required.
- Open the required user's profile.
-
Click the PROJECTS tab to open the section with a list of projects this user has access to.
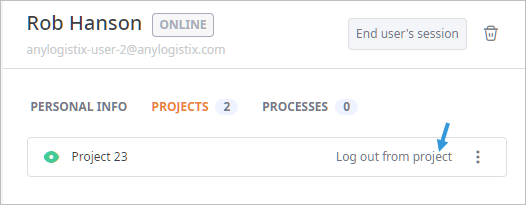
- Click Log out from project.
- In the confirmation dialog box click Log out to confirm the action.
- To log out a user from the project via the project's profile
-
You must be an administrator or this project's owner.
- Click PROJECTS in the toolbar of the Control Panel.
- Use the filters above the list of projects to find the required project.
-
Select the required project to open its profile in the right panel.
The USERS section will open by default, showing all users that have access to this project.
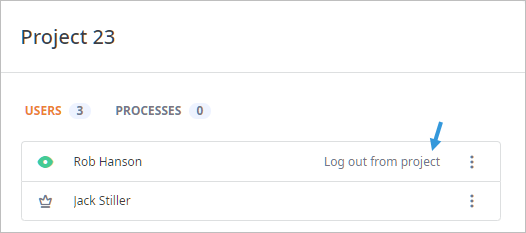
- Click Log out from project.
- In the confirmation dialog box click Log out to confirm the action.
You can share access to a project either from the user's profile, from the project's profile, or from the Manage Users dialog box.
- To share access to a project via the user's profile
-
Administrator rights are required.
- Open the required user's profile.
- Click the PROJECTS tab to open the section with a list of projects this user has access to.
- Click the Share access to project drop-down list. Now you may use the quick search by typing the name of the project if required.
- Check the required project(s), then click Add.
- To share access to a project via the project's profile
-
You must be an administrator or an owner of this project
- Click PROJECTS in the toolbar of the Control Panel.
- Use the filters above the list of projects to find the required project.
- Select the required project to open its profile in the right panel. The USERS section will open by default, showing all users that have access to this project.
- Click the Add user drop-down list.
- Select the checkboxes next to the users you need to share the project with.
- Click Add. The required user(s) will be granted access to this project.
You can revoke access to a project either from the user's profile, from the project's profile, or from the Manage Users dialog box.
- To revoke access to a project via the user's profile
-
Administrator rights are required.
- Open the required user's profile.
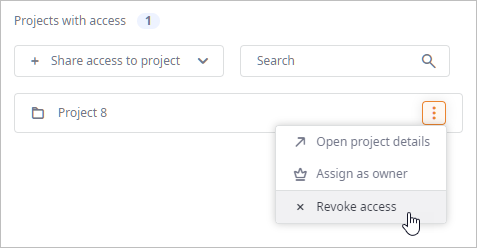
- Click the PROJECTS tab to open the section with a list of projects this user has access to.
-
In the Projects with access section click
 referring to the required project to open the actions menu.
-
Finally, select
 Revoke access.
- To revoke access to a project via the project's profile
-
You must be an administrator or an owner of this project.
- Click PROJECTS in the toolbar of the Control Panel.
- Use the filters above the list of projects to find the required project.
- Select the required project to open its profile in the right panel. The USERS section will open by default, showing all users that have access to this project.
-
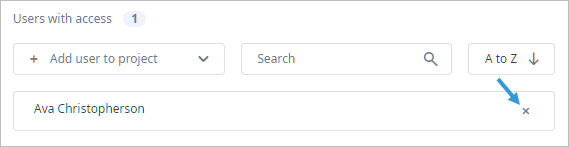
Revoke access of the required user in the Users with access
section by doing either of the following (depending on your user type):
-
If you are the project owner, click the Remove icon in the record of the required
user.
The user will lose access to this project.
-
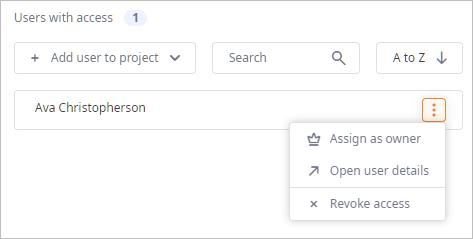
If you are the product administrator, click
referring to the required user, then select Revoke access.
-
If you are the project owner, click the
An owner can be assigned from the project's profile or from the user's profile.
Administrator rights are required.
- To set a user as a project owner from the project's profile
-
The project owner may also assign a new owner from the project's profile while canceling his own ownership (administrator rights are not required in ths case).
- Log in as administrator. The PROJECTS tab will open by default.
- Use the filters above the list of projects to find the required project.
- Select the required project to open its settings in the right panel.
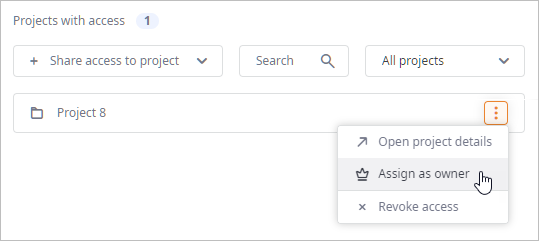
-
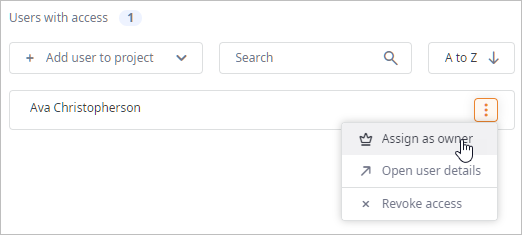
In the Users with access section click referring to the required user to open the actions
menu.
-
Finally, select
 Assign as owner.
- To set a user as a project owner from the user's profile
-
- Log in as administrator. Click the USERS tab.
- Use the filters above the list of users to find the required user.
- Select the required user tile to open its profile in the right panel.
- In the user's profile select the PROJECTS tab.
-
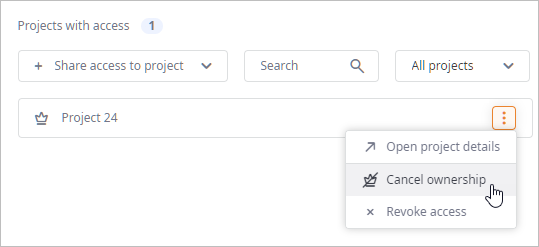
In the Projects with access section click
referring to the required project to open the actions menu.
-
Finally, select Assign as owner.
Project ownership can be canceled from the project's profile or from the user's profile.
- Users can cancel only their own ownership in the owned project, while the administrator can cancel ownership of any user in any project.
- The processes started by this user will not be affected. If required you can stop them .
- To cancel project ownership from the project's profile
-
This can be done by the administrator or by the project owner.
- Open the Control Panel. Depending on the user type you:
- Log in as administrator.
-
In the anyLogistix toolbar click and select
Control panel.
The PROJECTS tab will open by default.
- Use the filters above the list of projects to find the required project.
- Select the required project to open its settings in the right panel.
-
If you are the project owner, simply click Cancel ownership in the
project's tile.

If you an administrator:
-
Click to open the actions menu.
-
Select
 Cancel ownership.
-
Click
-
In the opened Cancel Ownership dialog box select the required option:
- Assign no owner — to simply cancel the ownership of the current owner and leave the project without an owner.
- Assign a new owner — to cancel the ownership of the current owner and assign a new owner.
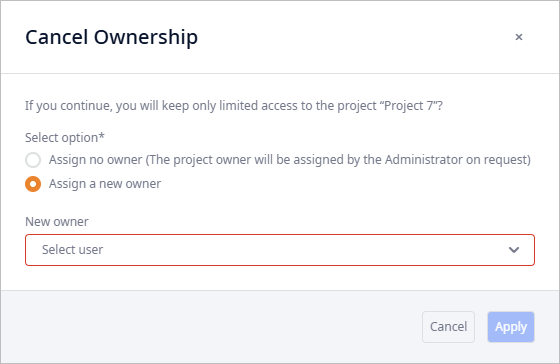
- Select the new owner from the New owner drop-down list [the list is available only if the Assign a new owner radio button is selected].
- Click Apply to apply the changes.
- Open the Control Panel. Depending on the user type you:
- To cancel project ownership from the user's profile
-
Administrator rights are required.
- Open the required user's profile.
- Click the PROJECTS tab to open the section with a list of projects this user has access to.
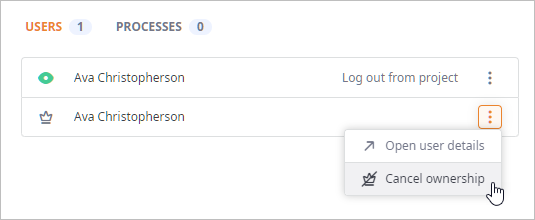
-
Click referring to the required project to open the actions menu.
-
Select Cancel ownership.
-
In the opened Cancel Ownership dialog box select the required option:
- Assign no owner — to simply cancel the ownership of the current owner and leave the project without an owner.
- Assign a new owner — to cancel the ownership of the current owner and assign a new owner.
- Select the new owner from the New owner drop-down list [the list is available only if the Assign a new owner radio button is selected].
- Click Apply to apply the changes.
anyLogistix Professional Server users can change only their own password, while the administrator can change password of any user.
Desktop version users cannot change their password.
To change a user's password (by the administrator)
Administrator rights are required.
- Open the required user's profile.
-
In the PERSONAL INFO section click the Change password button to open the
Change Password dialog box.
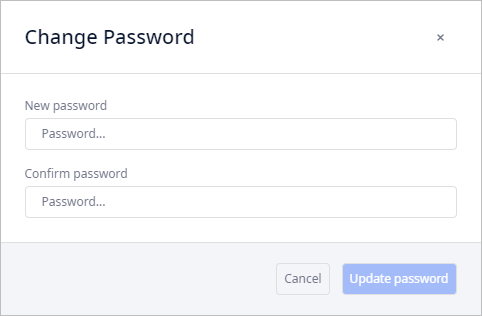
- New password in the New password field.
- Confirm the new password in the Confirm password field.
- Finally, click Update password at the bottom of the dialog box.
- Depending on your user type, open administrator or user profile.
-
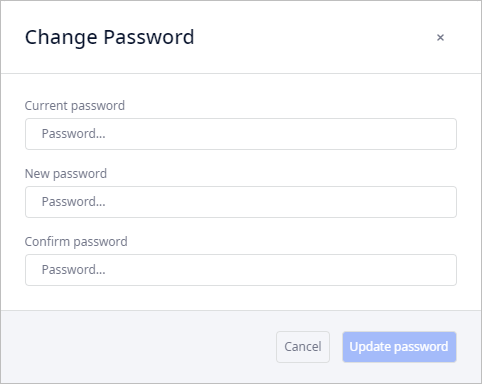
Click Change password to open the Change password dialog box.
-
In the opened Change Password dialog box specify:
- Current password in the Current password field.
- New password in the New password field.
- Confirm the new password in the Confirm password field.
- Finally, click Update password at the bottom of the dialog box.
Administrator rights are required.
- Open the required user's profile.
- Now click End user's session in header of the right panel. The confirmation dialog box will open.
-
Click End session to confirm logging out this user from the profile.
The running processes started by this suer will not be affected.
Administrator rights are required.
- Open the required user's profile.
-
Click
 in the top right area of the user's profile. A confirmation dialog will open.
-
Click Remove user to delete its profile from the system.
The license of this user will be returned to the server. You can reassign it later.
The processes started by this user will not be affected. If required you can stop them .
Note that you may remove a project owner this way. In this case the project will have no owner. New users (that previously had no access to it) will have to contact the administrator to get access to it, unless a new owner is assigned.
-
How can we improve this article?
-