

We shall start our tutorial with a pre-configured Gradle project.
If you have trouble configuring your environment, contact our support for assistance.
To have our environment properly set up we need to:
- Create a new project that we will be using in this tutorial.
- Download and connect the Java API library.
- Create the .java class file that will be used as our API client.
Let us begin with creating a new project.
The numbered lists in tutorials are actually checklists. Click the numbers to save your progress!
Create a new project
-
Click the Close project button in the anyLogistix toolbar.
The Home page will open.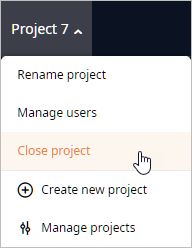
-
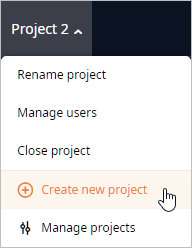
Click the
 Create project button.
The new project will be created with its tile selected by default.
Create project button.
The new project will be created with its tile selected by default.
The content of the tile differs depending on the anyLogistix edition you are using.
-
Rename the project to API_tutorial by clicking its default name in the tile, and then specifying the new one.
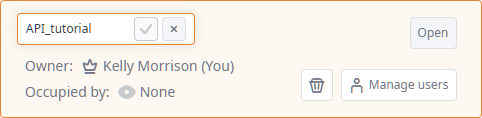
- Click Open to open the new project.
Now we will download the Java API library.
Download the Java library
-
Click
 Help and select
 Get API Libraries from the menu to open the dialog box.
-
In the opened dialog box click the tile of the Java API library.
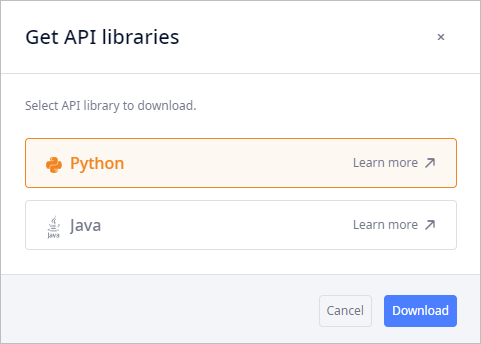
- Click Download. The selected library will be downloaded to your device. The dialog box will close automatically.
- Now move the downloaded library file to the lib folder of your gradle project.
For the Gradle project to consider the new library, we will add a dependency to the build.gradle file.
Add the Gradle dependency
- Open the build.gradle file in the tree of your IDE (integrated development environment).
- Add the following line to the block of dependencies: implementation fileTree(dir: 'lib', include: ['*.jar']).
-
Now click the
 Load Gradle Changes icon.
Finally, we can create a new java class that will be later populated with API.
Create a .java file that will contain the API instructions
- Right-click the java folder (in the src -> main folder of your gradle project) and select New -> Package.
- Name it, for example, openapiusage, then press Enter.
- Now right-click the just created package folder (openapiusage) and select New -> Java class.
- Name it ApiTutorialPhase1, then press Enter. The new file will be created, you will be instantly taken to it.
-
In the just created file, specify the classes to import (below the package name):
The first section of each java class contains lists and packages required for this class to work properly. By importing these classes, we allow the class to create and use implementations of these classes, and allow the usage of all public methods from them. The code will not work without these statements.
import org.alx.openapi.v1.ApiClient;
import org.alx.openapi.v1.ApiException;
import org.alx.openapi.v1.api.OpenApiApi;
import org.alx.openapi.v1.auth.ApiKeyAuth;
import org.alx.openapi.v1.model.ApiBasicRun;
import org.alx.openapi.v1.model.ApiDashboardPage;
import org.alx.openapi.v1.model.ApiExperimentResult;
import org.alx.openapi.v1.model.ApiSimulationRunConfigurationWrapper;

import java.io.File;
import java.time.LocalDateTime;
import java.util.List;
That's it. We have completed configuring our environment. In the next phase we will create the java class itself and add API requests to communicate with the anyLogistix project.
-
How can we improve this article?
-