We shall start with obtaining the data that will serve as the basis for our experiment. Since Simulation experiment requires optimized data to simulate the delivery process and exclude every possible supply chain drawback, you may do either of the following:
- Provide your own optimized data
- Instantly import the scenario that is based on the data from the Network Optimization experiment result.
-
Convert the last NO result to the SIM scenario.
In the latter case you must adjust your scenario by setting the Backorder Policy to Not allowed (defined in the Demand table).
Either way, you should have a supply chain model containing the following parameters:
- Demand per product
- Distribution centers located in optimal places
- Transportation costs
- Site opening costs
The numbered lists in tutorials are actually checklists. Click the numbers to save your progress!
Convert Network Optimization experiment results to the Simulation scenario
-
Click the
 Convert to a new scenario
icon in the top iteration card of the Result 3 item.
-
In the opened dialog box select the
 label in the Select scenario type section.
- Now click Convert to convert the result to the new scenario of simulation type.
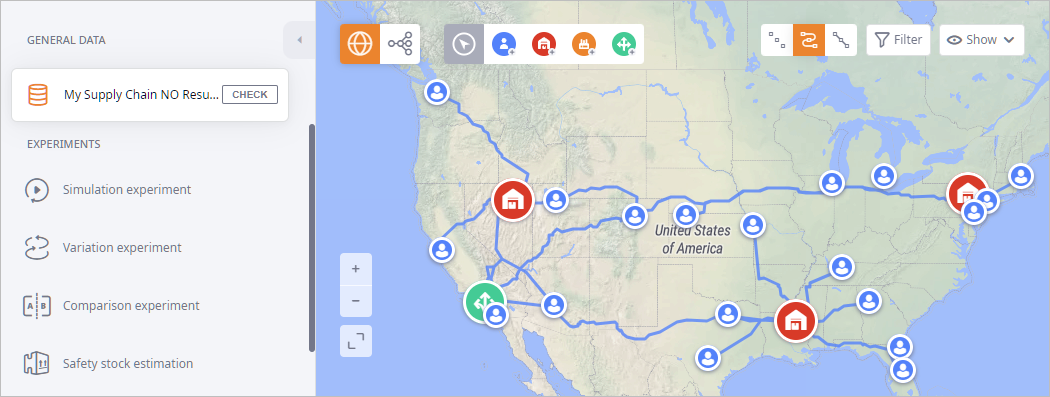
The aim of the Simulation experiment is to model the actual products delivery on the GIS map with detailed statistics generated in real-time. It is used as well for what-if scenarios to see how the changes you make affect the outcome.
After receiving the first simulation results you can run the simulation experiment to test different what-if scenarios in search for the best balance between the inventory volume and service level quality.
Simulation experiment requires properly configured sourcing and inventory policies. In this phase we will create and define sourcing policy.
- The sourcing policy is used to define the products to ship, their source(s) and destination(s).
- The inventory policy is used to optimize the amount of products to keep at a particular distribution center. It must be the least possible amount covering all the incoming orders.
If you choose to work with the scenario based on NO results, the Sourcing and Inventory tables will already contain all the required records, as a result, you will only have to modify them. This tutorial is based on the imported scenario with the data derived from the NO experiment result.
Prior to creating the policies, we will create a group of distribution centers. This step will simplify the process of defining inventory and sourcing policies as we will define them for the whole group, rather than for each distribution center individually.
Let us start with creating a group for distribution centers.
Create a group of distribution centers
-
Navigate to the Groups table.
You will see that it already contains a number of groups.
Judging from the names of the groups we can see that some of them were created as the result of the GFA experiment (above the line), while the others were created by us while completing the Network Optimization tutorial (below the line).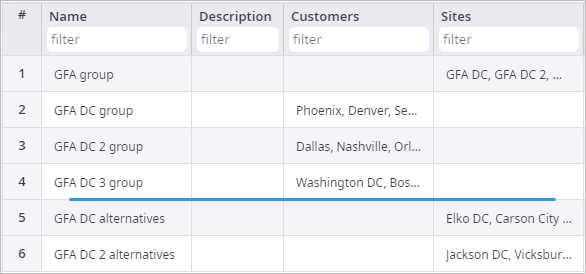
- Click Add to create a new group. A new Group table record will be created.
- Double-click the Group cell and type in DCs to specify the name of the group.
We have created and renamed a new group. Now we need to define the content of the group. We know that this group will contain distribution centers. The distribution centers we need can be defined in the Sites column of this table.
Define distribution centers for the group
-
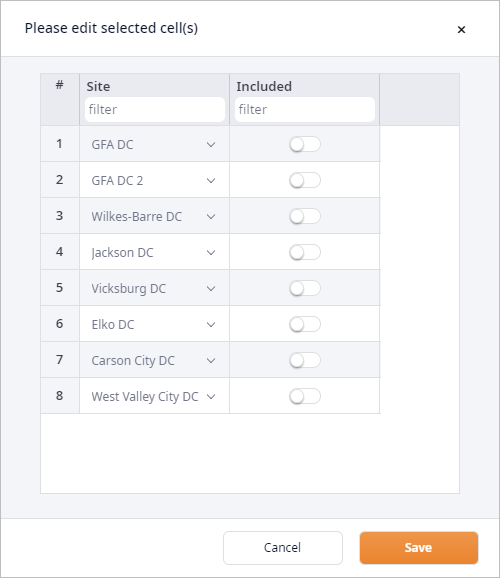
Double-click the DCs row cell in the Sites column. A dialog box will open containing all the available distribution centers to choose from.
-
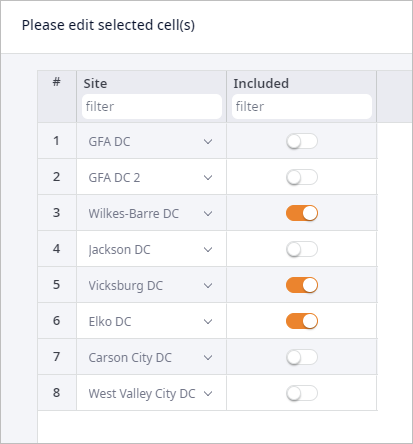
Click the toggle buttons in the Included column referring to the Wilkes-Barre DC, Vicksburg DC, and Elko DC.
-
Click Save to close the dialog box and apply the changes.

Now we can move on to define sourcing and inventory policies.
First, we will define sourcing policy to organize the product shipping process from the source to the delivery destinations.
Create a sourcing policy
-
Navigate to the Sourcing table.
It already contains a lot of policies, which were created automatically based on the
Product Flows
table records (those records were expanded on converting the Network optimization scenario type to the Simulation scenario type).
The Sources column contains distribution centers which will be servicing customers that are defined in the Delivery Destination groups. The content of the groups can be seen in the Groups table. In other words, the sourcing policy is already created and defined for customers and distribution centers.
We will now substitute the existing policies with 2 records, which will allow us to have just two policies: one for distribution centers and one for customers.
-
Create two new policies by clicking Add at the bottom of the table editor.
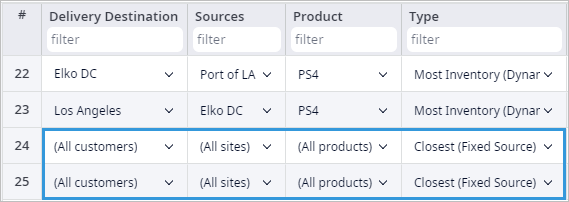
Now we need to define parameters of the policies. Let us start by specifying the delivery destinations.
-
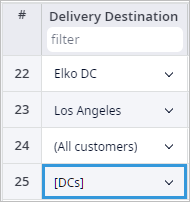
Double-click the Delivery Destination column cell of record #25, and select [DCs]
from the drop-down list. This record defines sourcing policy for the distribution centers.
The record #24 defines sourcing policy for the customers. We will leave the set by default delivery destination as it is, since it already includes all the customers.
-
Double-click the cell in the Sources column of the record #24, check
[DCs] from the drop-down list of available sources and uncheck (All sites).
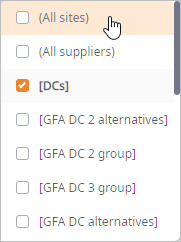
- To close the drop-down list, click any empty spot beside the Sourcing table. The content of the cell will change.
- In the same way set Port of LA as the source for the distribution centers (record #25).
-
Specify PS4 in the two last Product column cells by
Ctrl + clicking them and press Spacebar to open the dialog box.
Select PS4 in the drop-down list and click Save to close the dialog box.
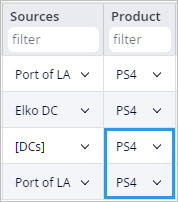
- The next step is to specify the sourcing policy in the Type column, or in other words the origin of the product. Our customers will purchase from the closest fixed source. As you can see, this type is selected by default.
-
With the final step we will set the inclusion type for all the initially offered policies to Exclude
since we no longer need to consider them.
- Navigate to the Inclusion Type column, select all rows by Ctrl + clicking the column name.
- Scroll down and deselect the rows 24 and 25 by Ctrl + clicking them, since these are the two sourcing policies that we will be using.
-
Press Spacebar to open a dialog box, click Include to open a drop-down list of available inclusion types and select
Exclude.
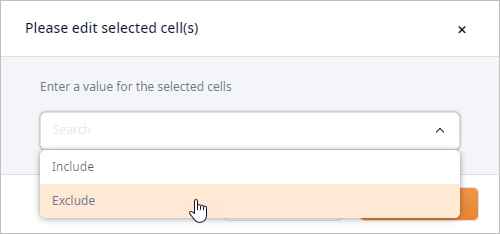
- Click Save to close the dialog box.
We have finally set up the parameters of the sourcing policy.

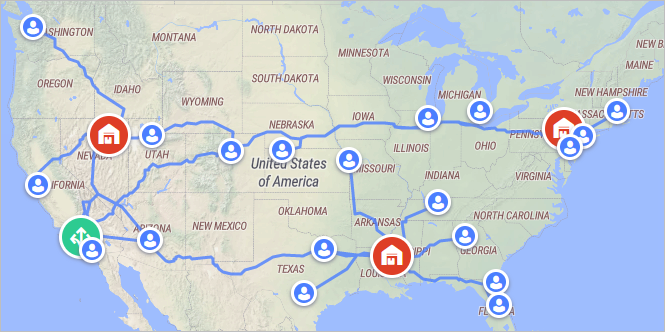
Let's see the connections between the suppliers and the distribution centers.
Explore the connections
-
Click the
 Show connections button.
It might take a while, since anyLogistix is downloading the routes online.
Now, let us define the inventory policies for our supply chain facilities.
Create inventory policy
- Navigate to the Inventory table. It already contains policies, which were created within the previous tutorials. We will not be using them since we have created the DCs group that contains all the warehouses we need.
-
Navigate to the Inclusion type column and set the inclusion type of all policies to
Excluded.
The table records containing the “Excluded” policies will be grayed out.
-
Now click the Add button below the table to create a new policy.

Now we need to specify the parameters of the inventory policy.
Specify inventory policy parameters
-
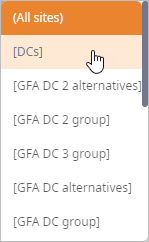
Double-click the (All sites) cell in the Facility column and select
[DCs] from the drop-down list of available facilities.
- Double-Click the cell in the Product column and select PS4 from the drop-down list of available products.
-
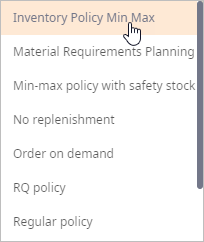
Double-click the Unlimited inventory cell in the Policy type
column and select the Min-max policy from the drop-down list of available policies.
Distribution centers will purchase Sony consoles using a min-max inventory policy, which allows products to be ordered when the inventory level falls below a fixed replenishment point.
-
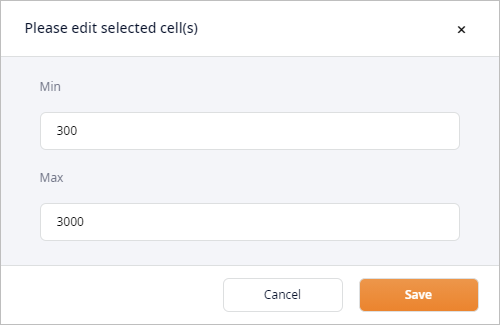
Click the Policy parameters cell. A dialog box will open, prompting you to specify
the Min and Max policy values.
- The Min value represents a stock level that triggers the reorder.
- The Max value represents the targeted stock level.
-
Set the Min value to 300, then set the
Max value to 3000.
We need to define the initial stock, or the number of consoles that we have at the beginning of the simulation.
- Click the cell in the Initial stock, pieces column and type in 1000. This will correspond to 1000 product items (PS4 consoles).
The Inventory table should look like this:

That's it. We have defined the sourcing and inventory policies. Phase 1 of this tutorial is completed. It was the last step on our way to setting up the Simulation experiment
Click the link below to proceed to Phase 2.
-
How can we improve this article?
-

