In the GFA Tutorial we created a supply chain scenario from scratch, populated it with customers, demand, and executed the GFA experiment. In this tutorial we will use that scenario to later compare the received results of the two greenfield analysis experiments.
The aim of the GFA with roads experiment is to find distribution center location(s) considering the population of the cities and the actual roads connecting them.
Once you download and import the My Supply Chain (GFA with Roads) scenario, you may proceed to configuring the experiment parameters.
The numbered lists in tutorials are actually checklists. Click the numbers to save your progress!
Configure parameters of the GFA with roads experiment
- In the experiments section click the GFA with roads experiment tile to open its controls.

- In the expanded tile click the
 Show settings icon to open the experiment's
settings.
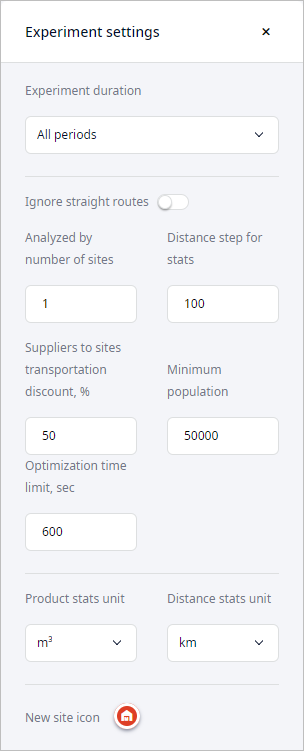
Now we can set the experiment a task to find the best locations for a certain quantity of distribution centers, since we already know the optimal number of distribution centers from the result of the GFA experiment.
-
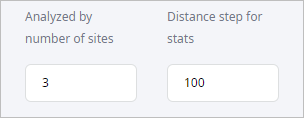
Click the Analyzed by number of sites field and type in 3.
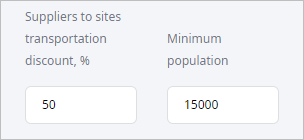
- Filter the cities to consider by specifying the Minimum population of 15000 people.
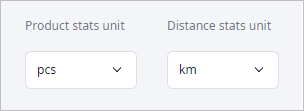
- Set Product stats unit to pcs,
since we set our product to be measured in pieces in this scenario.
- Now run the experiment by clicking
 Run on the experiment's tile.
Once the experiment is completed, a new Result item will be created below the GFA with roads experiment tile. You will be automatically taken to the new item's page containing the experiment results.
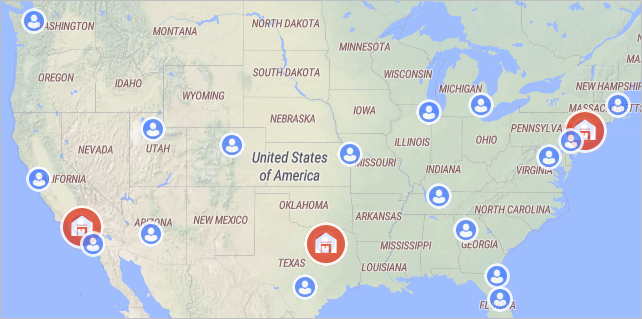
Let us take a closer look at the Result page. The distribution centers (DCs) were placed in the most advantageous locations, considering actual roads and population of the cities.
Since the experiment considers actual roads we can visualize them on the GIS map.
Enable paths on the GIS map
- Click the
 Show connections
icon to visualize paths from each distribution center to each customer.
The paths will be depicted as straight lines. Let anyLogistix download the data. This may take some time depending on the internet connection speed and the number of routes. Once anyLogistix applies the downloaded information to our map, we will be able to see the actual routes, which connect customers to each distribution center. The GIS map sourcing paths will change their shape in accordance with the available roads leading from the warehouses to the customers.
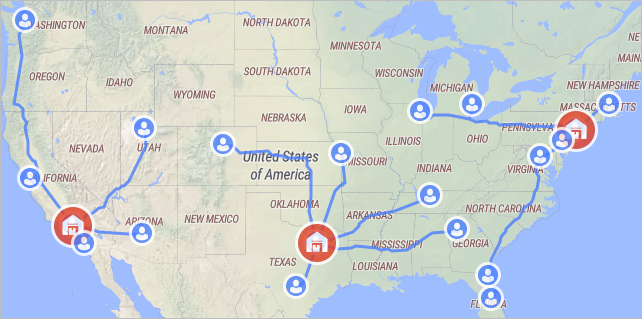
The result seems to be similar to the one received by the GFA experiment, but if we take a closer look at the locations of the three distribution centers, we will see that they differ, which also affects the set of customers for each distribution center.
Hover mouse cursor over the image below to see the difference.

Now let us examine each location individually.
Check distribution center locations
-
We shall start with the distribution center in the western part of the United States. Place mouse cursor over the distribution center icon to center the map while zooming in. Scroll mouse wheel to zoom in.
You will see that it is located in the center of Los Angeles. Now compare it to the location offered by the GFA experiment, you will see that it is located too far from the closest highway/city.
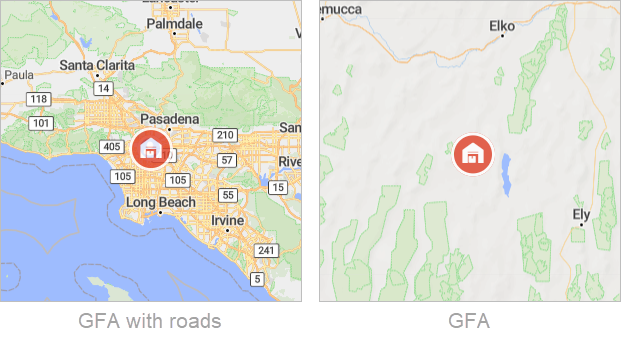
- Now we will check the rest of the two distribution centers. Zoom in to the distribution center located in the middle.
This distribution center is located in Marion, while the distribution center offered by the GFA experiment is located too far from the closest highway / city.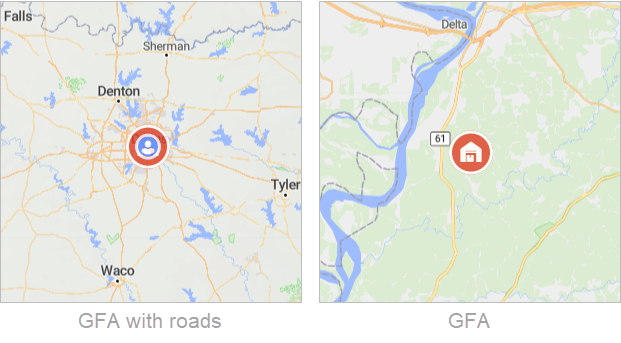
- Zoom in to the distribution center located in the eastern part of the United States.
You will see that it is located in New York, while the GFA offered distribution center is not far from Moscow.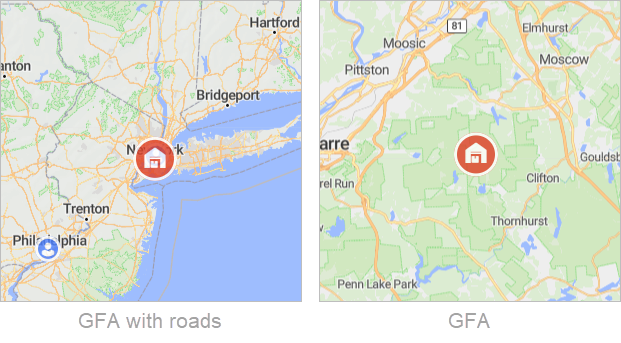
As we can see, the distribution center locations offered by the GFA experiment require further adjustment as they are too far from the required infrastructure, while distribution centers offered by the GFA with roads experiment are located in the center of the cities. You can move them to any surrounding area if required.
That's it. We have completed the GFA with roads tutorial.
Now we can move on to specify the price of the product, cost of opening a warehouse and the cost of processing the outgoing shipments to further optimize the supply chain.
-
How can we improve this article?
-

