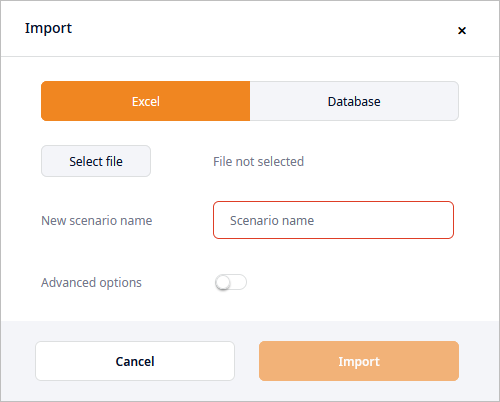
The scenario data that you plan to import needs to follow certain naming and formatting conventions. To ensure that naming and formatting are correct, you may want to create a scenario template and fill it with your own data.
The coordinates of the objects in the importing scenarios will be automatically filled, unless:
- The coordinates are already specified in the file (values differ from zero).
- The file contains more than 200 locations. In this case autofilling of coordinates will be skipped. You can initiate autofilling in the Locations table after the scenario has been imported.
On importing data into the existing scenario, you can add the missing data to it, but be careful.
To import scenario data from MS Excel files
- You can import scenarios by doing either of the following:
- Drag-and-drop the required scenarios straight onto the anyLogistix Workspace.
-
Click the Add button on the left side of the Scenarios ribbon,
and then select
 Import scenarios.
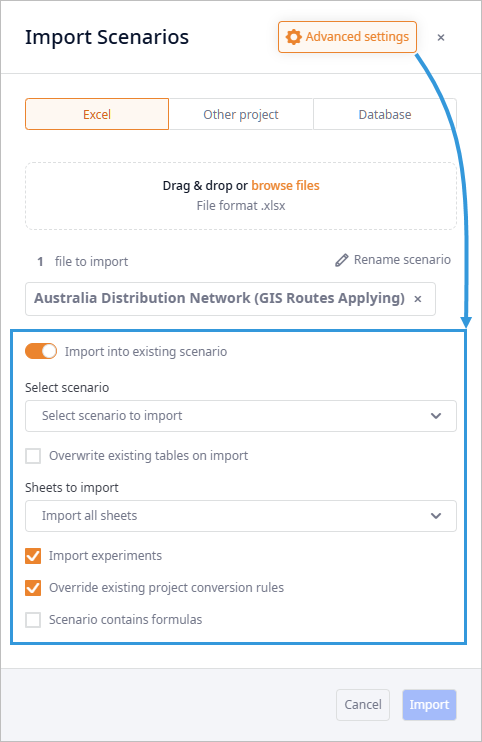
The Import Scenarios dialog box will open:
If you dragged files to the anyLogistix Workspace, the Import Scenarios dialog box will instantly show them as the files to import. Otherwise, the list of files to import will be empty.

- Leave the Excel tab selected.
-
If required, add the additional MS Excel files with the scenario data to import by either dragging them onto the dialog box, or by clicking the
browse files link, and navigating to the existing files.
Multiple import / export supports 10 scenarios. If you are importing e.g. 15 scenarios, the importing process will start for 10 of them, while 5 scenarios will be queued.
-
If required, change the name of the importing scenarios by clicking
 Rename scenarios.
This option is available if at least one scenario is added to the import list.
-
If required, you can clear the list of the importing files by clicking
 Remove all.
This option is available if at least two scenarios are added to the import list.
-
Click the Advanced options if you need to modify the import parameters:

- Import into existing scenario — [not available if multiple scenarios are added to the import list] enable the toggle button to import into one of the currently open scenarios.
- Select scenario — [available only if the Import into existing scenario
option is enabled] click the drop-down list of the currently open scenarios to specify the scenario to import the data to.
Prior to importing data into the existing scenario complete the action below:
- Explicitly specify the data to be imported in the Sheets to import option, otherwise, all tables will be imported, resulting in data duplication.
- Remove the data from the existing scenario that is about to be updated by the imported scenario to avoid data duplication (e.g. when importing demand, clear the existing demand data).
- Overwrite existing tables on import — [unselected by default] if selected, the data of the importing scenario will substitute the data of the scenario it is imported to. Otherwise, certain data will be duplicated in the destination scenario.
-
Sheets to import — click the drop-down list to select the tables to import.
All other tables will not be imported.
If no table is selected, all tables will be imported.
- Import experiments — [selected by default] if deselected, the experiments contained in the MS Excel file will not be imported.
- Override existing project conversion rules — [selected by default] the unit conversions from the importing file will overwrite the project's existing unit conversions.
- Scenario contains formulas — [unselected by default] if selected, anyLogistix will consider expressions defined in the template cells.
-
Click Import to close the dialog box and import the scenario data.
If import takes too long, you can cancel it by right-clicking the scenario's tab and selecting Cancel import. This option is available only during the scenario import.
The newly created scenario will be located in the scenarios ribbon.
Please note the following possible issues:
- All the required units (and their corresponding conversions in case of user-defined units) that are missing in the destination project will be imported with the scenario. You will see a warning message with a list of such units.
- If you are importing from a database that has wrong structure or does not contain an anyLogistix scenario at all, an error message will pop up notifying that the template is missing data.
- If the importing file has duplicating objects, they will be skipped. The warning message will list such objects
-
How can we improve this article?
-

