

If required, you can rename an existing scenario.
This can be done:
- In the Properties of the required scenario.
- In the Import Scenarios dialog box. The changes will apply to the imported scenario. The original scenario in the MS Excel file will keep its name.
- In the Export dialog box. The changes will apply to the destination file the scenario is exporting to. The original scenario in the project will keep its name.
To rename a scenario in the Properties dialog box
If you need the exporting copy of a scenario, you can do it during export.
-
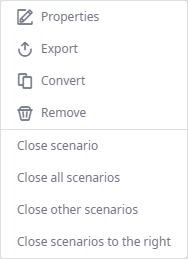
Right-click the required scenario and select
 Properties from the drop-down list to open the dialog box.
-
Click the Scenario name field and type the new name.
You can't have two scenarios with the same name.
- Click Save to apply the changes.
To rename a scenario in the Import Scenarios dialog box
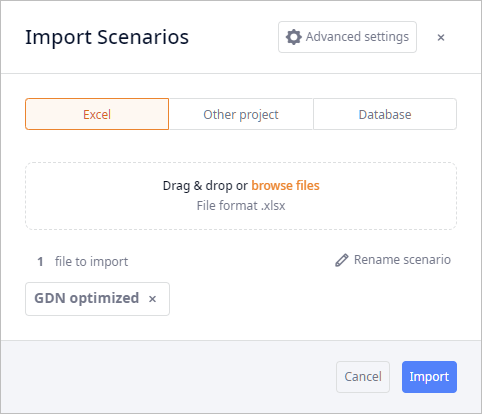
If required, you can define a new name for the imported scenario during the import. This will only rename the imported copy of the scenario. The original scenario in the MS Excel file will keep its name.
-
Open the Import Scenarios dialog box.

- Add at least one scenario to import.
-
Click
 Rename scenario.
The Rename Scenario dialog box will open.
This option is available if at least one scenario is added to the import list.

-
Click the text box containing the scenario name, then specify the new name.
If you are importing multiple scenarios, you will be able to change the names of all scenarios here.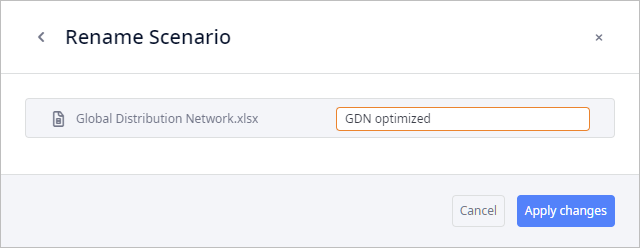
-
Click Apply changes. The dialog bow will close, the new scenario name will be used for import.
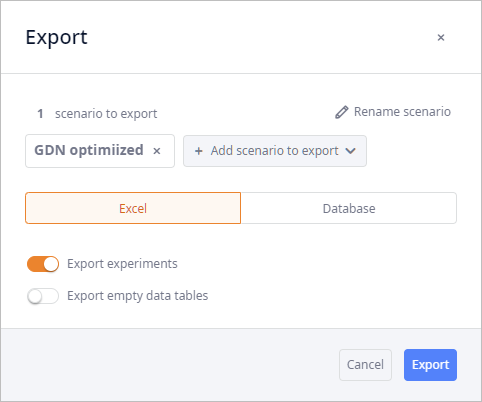
To rename a scenario in the Export dialog box
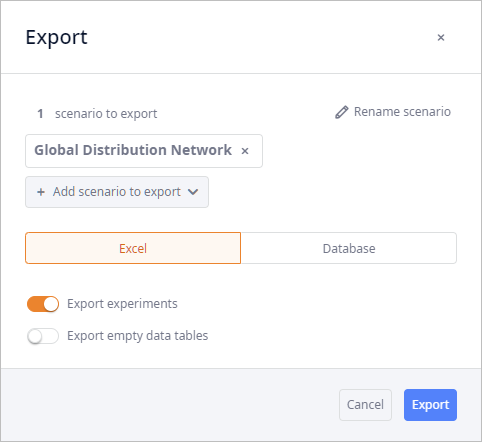
If required, you can define a new name for the destination file. This will rename the exported copy of the scenario. The scenario that is in the project will keep its name.
-
Right-click the required scenario, then select
 Export.
The Export dialog box will open.
-
In the Export dialog box click Rename scenario.
The Rename Scenario dialog box will open.
This option is available if at least one scenario is added to the export list.

-
Click the text box containing the scenario name, then specify the new name.
If you are exporting multiple scenarios, you will be able to change the names of all scenarios here.
-
Click Apply changes. The dialog bow will close, the new scenario name will be used for export.
-
How can we improve this article?
-