

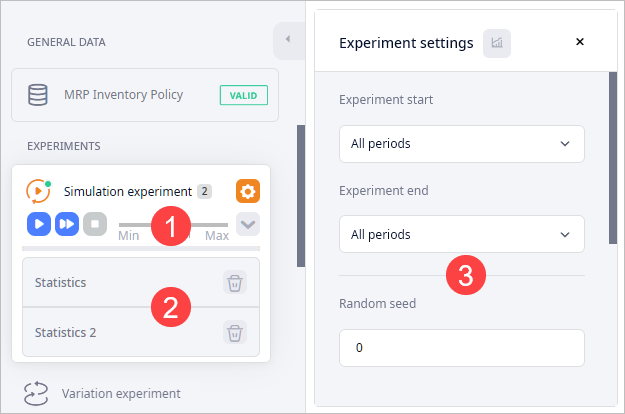
In the experiment mode you get access to the experiment's:
- Controls — use them to manage the experiment and its settings.
- Results — results of the experiment per experiment run.
- Settings — experiment's settings.
The dashboard in this mode contains statistics gathered during the experiment run.
To switch to the experiment mode
-
Click the required experiment type.
You will see its controls, settings, and result items. The dashboard below the map will now contain statistics gathered during the experiment run.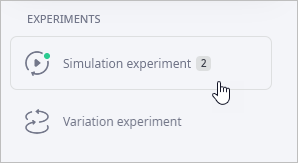
To switch to the supply chain mode
-
Click the MRP Inventory Policy tile.
The dashboard below the map will now contain the input tables.

The experiment status indicators show up at the experiment icon
| indicator | Description |
|---|---|

|
Experiment settings are correct. |

|
Experiment is running. |

|
Experiment is paused. |

|
Incorrect experiment settings. The list of errors opens over the map area.
Click the |
The set of controls differs depending on the experiment type
| Button | Command | Description |
|---|---|---|

|
Run |
Starts the experiment (it is substituted by
 Pause during the experiment run). Pause during the experiment run).
|
|
|
Pause | Pauses the experiment (it is substituted by Run if the experiment is not launched or if it is paused). |
 |
Run in virtual time mode without animation | (Active only if the experiment is not running) starts the experiment and runs it without displaying the GIS map. |

|
Stop | (Active only if the experiment is launched or paused) stops the experiment. |
|
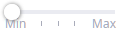
Speed slider | (Active only if the experiment is launched) sets the experiment execution speed as a scale ratio between model time and real-time. The value defines the number of model time units (days) corresponding to one second of real-time. The x1 value sets the execution speed to one model day per second, the x2 value — to two model days per second, and so on. The max value sets the execution speed to the maximum. The maximum speed can be set when you need to simulate a model for an extended period of time and the model does not require you to set correspondence between the model time and the real-time units. The x0 value sets the execution speed to zero, which pauses the experiment. You can resume it by setting Speed to a non-zero value. |

|
Show settings | Changes the visibility of the selected experiment's settings. |

|
Show results | Collapses / Expands the list of received results. |
If the Results section is not open, click in the experiments
controls.
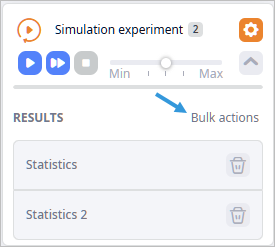
If required, you can switch to the bulk action mode.
Here you can find the list of experiment results per experiment run.

Each result item comprises:
| Element | Name | Description |
|---|---|---|
| Result name | Statistics / Result | Result name. You can define a custom name if required. |
|
|
Show settings | Shows experiment settings that were used for this result. |

|
Remove | [Control is located above the list of results in the Bulk actions mode] removes this result. |

|
Iterations | (Enabled by default, available in the result items of the Network Optimization, Variation, and Comparison experiments) shows the Iterations panel with the result's best solution(s). |
To observe results
-
Click the required result to observe its details in the statistics dashboard and on the map (if it can be displayed on the map).
If the experiment offers more than one solution, the selected result item will have the
control.
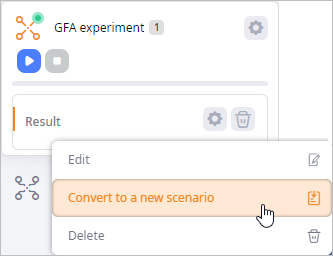
To convert a result to a scenario
-
Right-click the required result and select Convert to a new scenario to open the Convert Result dialog box.
- In the Convert Result dialog box:
- Specify the Scenario name.
-
Select scenario type to convert the result to:
if you convert the result to the scenario type that differs from the one that you are currently working with, the scenario data will be automatically adjusted.
-
 — label for scenarios of the Greenfield analysis type.
-
 — label for scenarios of the Network optimization type.
-
 — label for scenarios of the Simulation type.
-
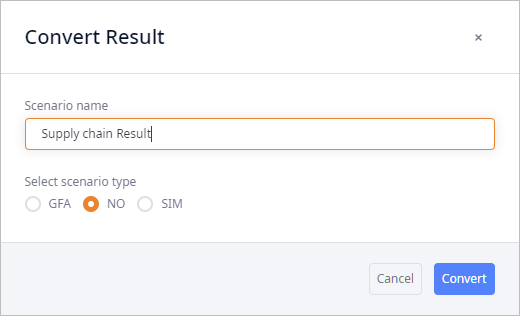
- Click Convert. The current results will be converted to the specified scenario type. You will be instantly taken to the corresponding type tab. The new scenario will be selected.
To rename a result item
- Right-click the result that you wish to rename and select Rename from the context menu to open the editing box.
- Type the desired name in the Result name field.
- Click Save to save the changes and close the dialog box.
To remove a result
-
Click on the required result item.
A dialog box will pop-up prompting you to confirm this action.
- Click OK to delete the result.
The bulk actions mode allows you to remove several results and compare several results at a time.
The mode is available if the Results section has 2 or more results.
To enable the Bulk actions mode
- Run the required experiment several times to have at least 2 results in the Results section.
-
Click the Bulk actions button to activate the mode.
To compare several results
- Run the required experiment several times to have at least 2 results in the Results section.
-
Click the Bulk actions button to activate the mode.
-
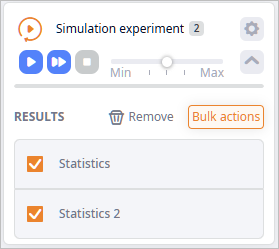
Select the checkboxes of the required results.
- Click Compare above the list of results. The Results Comparison dialog box will open.
To remove several results
- Run the required experiment several times to have at least 2 results in the Results section.
-
Click the Bulk actions button to activate the mode.
-
Select the checkboxes of the required results.

- Click Remove above the list of results. A dialog box will pop-up prompting you to confirm this action.
- Click OK to delete the results.
If the Settings window is not open, click in the experiments controls.
The header of the Simulation-based experiments settings (but the Safety stock estimation) additionally has the
 Statistics Configuration
control, which opens a list of statistics in the dashboard that can be collected during the experiment run.
Statistics Configuration
control, which opens a list of statistics in the dashboard that can be collected during the experiment run.
-
How can we improve this article?
-